CM-Cabinets Library User Guide
As an extension of the Fixed Pricing method for cabinets. The Door Price Group pricing is setup using the Library Catalog Manager.
This will be split up into 3 separate tutorials which must be completed in this order:-
Ensure you have only the Fixed Price category ticked so that any other pricing methods are not included, as these will affect the test results made later in these tutorials.

Click to view Job Setup > Client page of the Drawing Properties
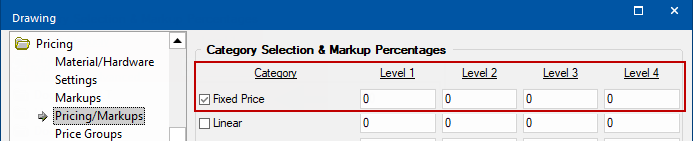
Pricing > Pricing Markups page
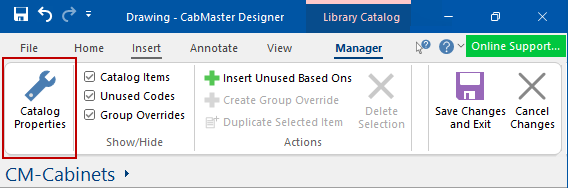
Open the Catalog Properties from either:-
How to access Catalog Properties in LCM
Open the Library Catalog Manager by clicking on command button on the View tab.
Then click on the Catalog Properties command button located top left.
OR
Enable the Use Fixed Price option on the Pricing > Pricing/Markups page by ticking the checkbox as shown.
Pricing > Pricing Markups page
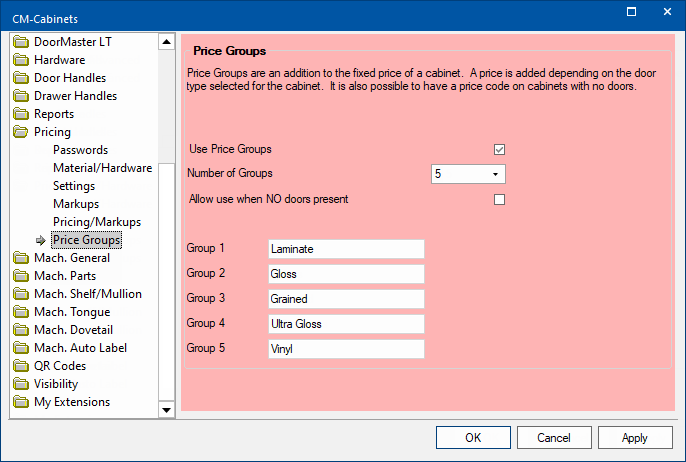
Enable the Use Price Groups option on the Pricing > Price Groups page.
The default Price Groups depend on the default door materials. However, they can be overridden on the Materials-Advanced > Door Options page. These are applied to all cabinets in job/drawing unless overridden on individual cabinets.
If no default exists for the chosen door materials (see Tutorial 3) then the system will apply 1 as the default can be changed/overridden here to apply to all cabinets,

CM-Cabinets Catalog Price Group default set to Laminate (Group 1 in this example) - Click to Expand
The Door Price Group can be overridden on individual cabinets selected in the LCM or on the drawing by either:-
- selecting a different material for the cabinet
- or
- overriding the Door Price Group for the cabinet.
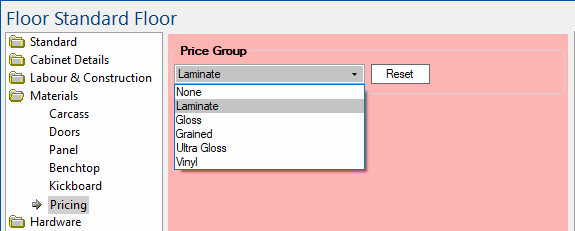
Cabinet Properties shows Price Group selection on Materials > Pricing page
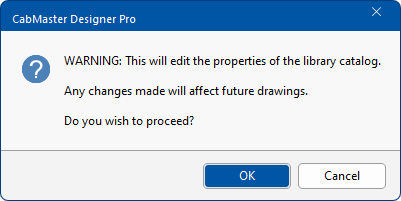
When all changes have been completed, you need to save the Catalog.
Using the Library Catalog Manager it is possible to update the underlying table containing the costs for that cabinet.
In this tutorial we will create a Door Price for a Floor Standard cabinet.
Select the Floor Standard in the Library Catalog Manager.

Library Catalog Manager - Click to Expand

Pricing > Price Group page in Cabinet Properties
The Pricing category discussed here is only available in the LCM for cabinets.
You will notice that the Fixed Sell will change. In this example $350 Fixed Cost + Group 1 Laminate $40 = $390.00
You will need to repeat the above steps for every cabinet that you want priced this way.
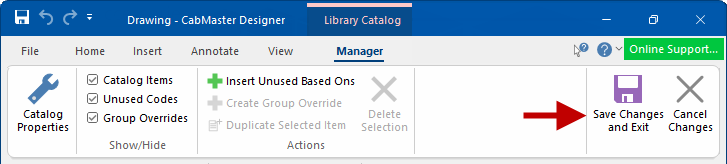
When you completed all changes in the LCM ensure that you click the Save Changes and Exit button.
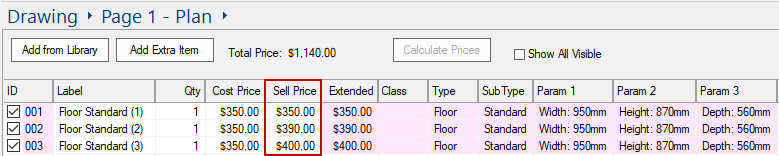
Place 3 Floor Standard cabinets on your plan or add in List View.

Price Group changed for each (numbered) cabinet in Materials > Pricing page
Then in List View we can see the Sell Price results:-
If the properties of the cabinet (such as its width) are amended whilst on a drawing this does not affect the cost.
You can set the Sell Price to calculate with additional charges based on the width. This means that if the width of the cabinet is amended then the Sell price will adjust accordingly, but not the cost.
However, the additional Door Group Price remains static i.e. not increasing with changes to the cabinet.
The only exception to this is when doors are totally removed, then no addition for Door Price Group, unless the Allow use when NO doors present checkbox on the Pricing > Price Group page is enabled.
Fixed Price plus Extra based on Width
In this example, if the cabinet's Width is greater than 950mm, then for each extra that is between 1mm and 100mm, another $10 will be applied.
If Width is between:-
- 1mm and 950mm then Extra will be $0.
- 951mm and 1050 (i.e extra 100mm) then Extra will be $10.
- 1051mm and 1150 (i.e. 100mm x 2) then Extra will be $20 (i.e. $10 x 2) and so forth.

Pricing > Fixed Price with additional cost based on width
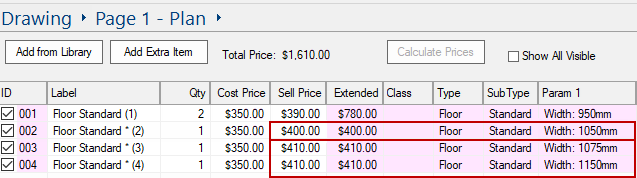
Test the above pricing in List View in a drawing. The Sell Price changes based on the Width i.e. :-
- Cabinet 1 is 950mm - Sell Price is $350 + $40 (Group 1 price) + $0 = $390.00
- Cabinet 2 is 1050mm (950mm + 100mm) = $350 + $40 (Group 1 price) +$10 (Extra) = $400.00
- Cabinet 3 is 1075mm (950mm + 125mm) = $350 + $40 (Group 1 price) + $20 (Extra) = $410.00
- Cabinet 4 is 1150mm (950mm + 200mm) = $350 + $40 (Group 1 price) + $20 (Extra) = $410.00
As you enter/edit the pricing details in for each cabinet in the LCM (Cost Price) or in the Catalog (Price Group etc), the database is automatically updated.
The Door Price Group table is an MS Access format table i.e. <your CabMaster folder>\Table\DoorPrice.mdb. It can be updated directly if you have the necessary skill to do so but this should never be necessary.
This tutorial is dependent on Tutorial 1 and Tutorial 2 being completed successfully.
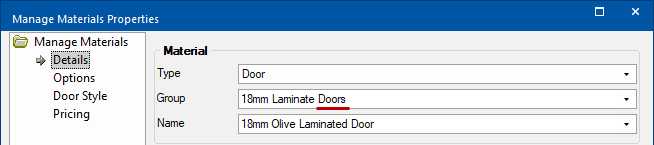
Open the Materials Manager and on the Details page select the material you want to set the Price Group for.
Select Material in Catalog or Drawing Properties - Click to Expand
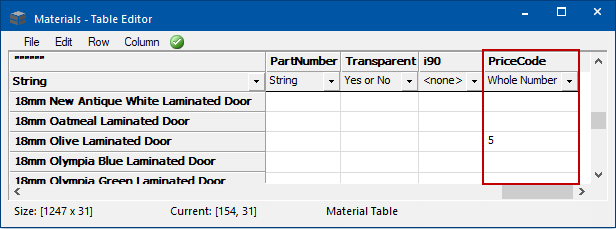
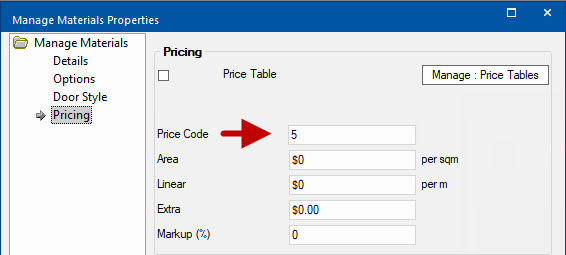
On the Pricing page enter a whole number from 0-10, which relates to the defaults set on the Pricing > Price Groups page as discussed in Tutorial 1.
Note on Price Code and Group numbers
The Price Code relates to the defaults set on the Pricing > Price Groups page, which in this example only uses 0-5

Pricing > Price Groups page - Click to Expand
Door material Pricing in Materials Manager - Remember to Save changes: Click to view
For this to work the related PriceCode column must be present in <your CabMaster folder>\Table\Materials.qlt file.
PriceCode column in table requirement
- See Help Topic Library Basics > Editors to find instructions on how to Add a Column to an existing table.
- Column heading must be PriceCode and use drop list to select Whole Number, as shown.
Make sure each material is saved after it has been edited.
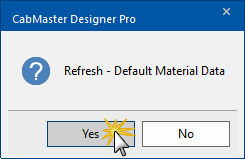
When you have completed all required changes and exited the Materials Manager, you must Refresh - Default Data Material.
We will see how this affects the pricing by changing the material on one of the cabinets created in Tutorial 2 to '18mm Olive Laminated Door'

Door Material must be Refreshed if changed - Click to Expand
It is important to click the Refresh button to make changes available irrespective of whether you change the material used in the Catalog/Drawing Properties on the Materials-Advanced > Door page or the Cabinet i.e. on the Materials > Doors page as shown.
As seen here, we have made changes to the Floor Standard (2) in our job/drawing.

Step 4 applied to Floor Standard(2) i.e. overrides default with Price Group 5
Click the Calculate Prices button in List View we can see the Sell Price results:-

Click to view LCM Price Group page
i.e. Fixed Price $350 + $ 65 <Vinyl> = $415.00 (click on image)